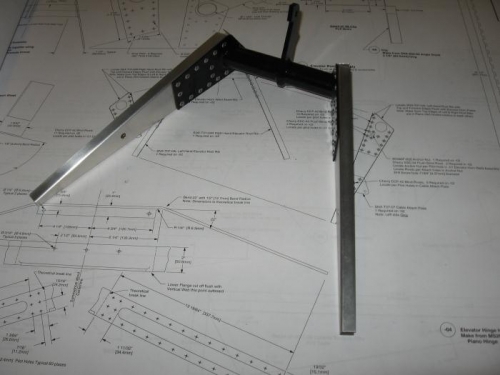
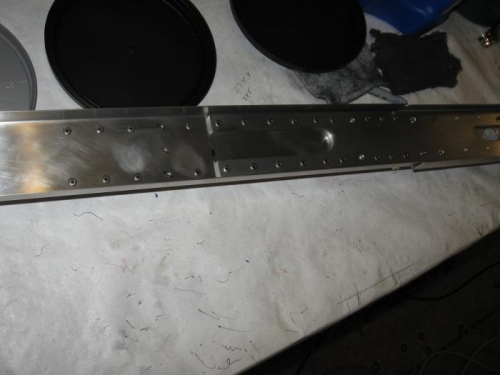
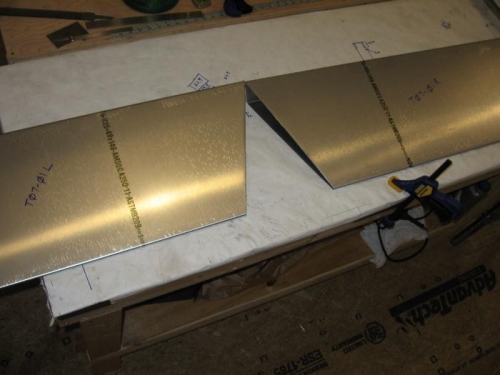
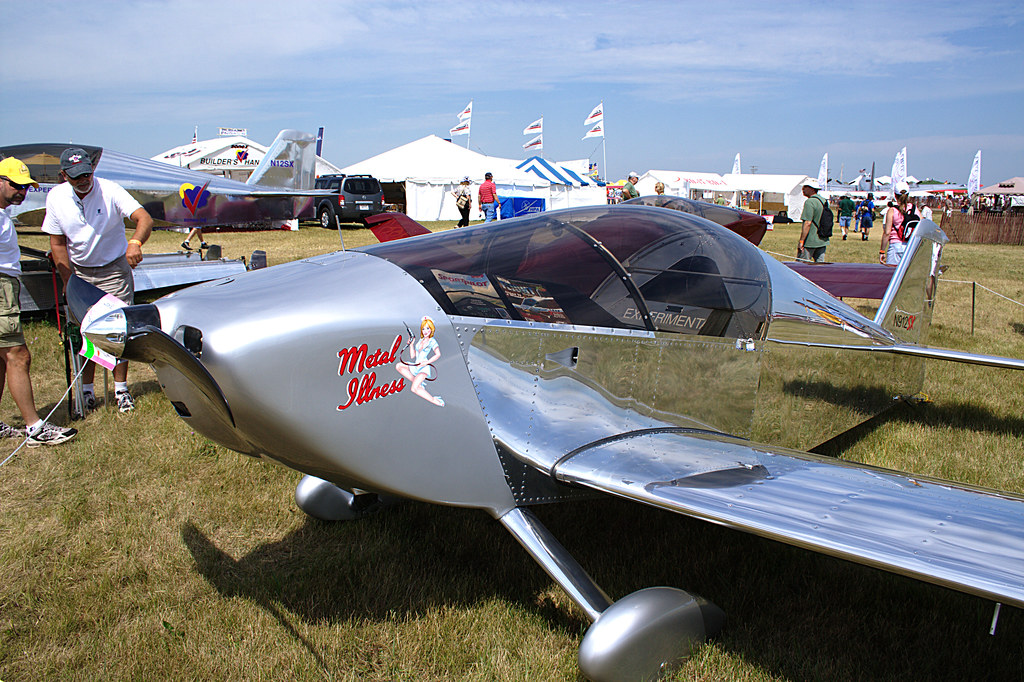
Yes, that's me. I have not posted to this blog in some time, which is shameful. But I have a good excuse: I've been building! Here are some shots of some of the parts I've been making:
Elevator Drive Horn / Root Rib Assembly:
Vertical Stabilizer Rear Spar:
Elevator Skins:
So as you can see, I have not been idle on the project, just on the blog. I'm just about ready to get assembly of the vertical stabilizer and the elevators underway. Once those are done I'll have some parts that actually look like airplane pieces.
05 August 2010
20 July 2010
Elevator Skins Cut
I cut the elevator skins last night, and have to say they are some of my best work to date. They are dead-on to plans spec, and look good. Here's the right one:
And here are both together roughly as they would be installed, with the wide cutout to the rear to allow for rudder movement:
I need to work on getting the ribs and hinges for the elevators done, and to do the horizontal stabilizer parts. It's all moving along more quickly now, and I feel like I have a better handle on the best ways to get things done.
19 July 2010
I Put Together My First Parts!
I have been fabricating individual parts for a while. This weekend I finally got to assemble some of them! I was going to start with the vertical stabilizer rear spar, but during the drill process I messed up one of the parts, so I had to order a replacement from Sonex. In the meantime I went ahead and finished up and assembled the forward stabilizer spar. My lovely wife immortalized me pulling the first rivet on Sonex 1416:
Sonex warns builders to keep the pressure on the pneumatic riveter around 35-40psi. I found at 35psi it sometimes did not have enough power to break the rivet stem. Above 38psi, however, it sometimes broke the rivet with enough force that the gun would jump and sometimes mar the surface of parts. So 36-38psi seems about the right pressure for me to use.
Once my replacement part arrives later this week I can finish the rear spar and finish assembly of the vertical stabilizer. In the meantime I've started fabricating parts for the elevators, starting with the skins which are a little tricky to get just right. I laid them out last night, and will start cutting them this evening. Onward!
12 July 2010
My Parts Bin is Filling!
My shelf of completed tail parts is growing nicely. I have basically finished the first three sheets of plans, which is most of the rudder and vertical stabilizer parts. The third page is the stabilizer skin, but since that comes pre-cut and pre-bent in the kit, all I had to do was deburr the rivet holes and the edges...about a half hour of work.
I'm currently making the parts on page SNX-T10, which I believe will finish up the parts I need to make the vertical stabilizer. I'll then have everything I need to build the vertical section of the Sonex tail. Almost.
Almost? Yes, the rudder drive horn on the first page (and ironically, the first part I worked on) has been driving me nuts. It is required to be bent at a 5.2 degree angle to match the rudder angle. However, the piece is a very asymmetrical shape, with one side being perpendicular to the bend line, and the other side being about 45 degrees to the bend line. This means there is less material on one side of the bend than the other on that side, which tends to make the part bend toward the thinner part rather than on the line. The following image shows the plans build line (solid) and the actual line where the bend occurs (dotted):
I have ruined two of these parts (at $38 + shipping each) trying to get this right. I've about given up trying to make it correctly, and will employ the wizards at my local EAA chapter to help me get it right. In any event, eventually I'll get that correct and I have plenty to do in the meantime!
06 July 2010
My FAA Build Log is Online
I had to figure out how I was going to log my build time, as required by the FAA for an Experimental Amateur-Built (EAB) airworthiness certificate. I knew I wanted to make a computerized log rather than an "old school" paper based log. I looked around at the options, and found several programs that would do the job. In the end I chose KitLog Pro.
What I like about KitLog Pro is that it stores your log info on your PC, but the company also hosts a website that you can upload your log to and keep a web-based copy so that other builders or interested parties can track your progress (and learn from your mistakes). Also, it's very easy to include up to three images with each log entry. I wish the number of images was unlimited, but it's probably a good idea to limit the number of pics I include so things don't get out of hand. After all, I'm logging my project, not scrapbooking!
Now that I have this in place, it makes it easier to know what to post on this blog. I'll post technical information on my KitLog page: http://www.mykitlog.com/MrMorden . That's where I'll include technical information, pictures of completed parts, etc. I'll use this blog for information that is more general, about the build process and how I think about it. Things the FAA doesn't care about, but that my friends and family might. I'll also include images here of major complete assemblies...things that actually look like they came off of an airplane.
25 June 2010
More Workshop
Why no updates? Because I'm still wrestling with getting my workshop ready. Last weekend my wife and I spent the entire weekend insulating the shop (she's a trooper!). R-19 fiberglass in the ceiling and R-13 in the walls. We covered it all up with DuPont Tyvek, a heavy paper-like polyethylene wrap that acts as a vapor barrier and keeps the fiberglass in the walls and out of my lungs. Here's what things are looking like now:
I like that the Tyvek is white, it increases light in the shop and makes it seem bigger. However, it is kind of paper-like (though very durable), so it remains to be seen if it will hold up to me moving around. If it starts getting ripped or punctured a lot, I'll probably bite the bullet and put up some gypsum wallboard, since it's only about $7 a 4x8 sheet at Home Depot.
The insulation made a noticeable difference inside the shed, but it's not enough in the Georgia heat. Temps in the worst part of a hot day are down from about 110 degrees inside to about 92 degrees. I think the remaining problem is one of a lack of air conditioning output. My 10,000BTU portable is not up to the task, so I'm going to get a 25,000+ BTU window unit. That should be able to power through all this heat and make things comfortable. I think I'm also going to put a tarp cover over the roof to keep the sun from beating directly on the metal. That's a minor measure, we'll see if it does anything.
What's next? Well, to get the larger AC unit installed, I will need 240V power. That means an electrician, and luckily one lives across the street. He's going to take a look, and we're going to take the opportunity to replace our ancient fusebox in the house with a modern breaker box, and do some other minor electrical work we've been putting off.
Hopefully the saga of getting a good workspace to build in is ending soon, and I'll be able to start posting about the actual Sonex build process soon. Those boxes of tail parts are screaming at me to get moving!
09 June 2010
Workshop Coming Along
The workshop for building my Sonex is coming along nicely. I got power run to the building, and have installed the 10,000 BTU portable air conditioner. Unfortunately, the A/C unit is no match for the Georgia heat in a metal building, so even running all out for hours, the temperature in the building is often above 90 degrees in the hottest part of the day. A lot of heat radiates down from the metal roof, so I'm looking at putting up some high reflectivity insulation that will block the heat filtering down and allow the A/C to do its job properly.
As for workspace, I just finished building two EAA standard workbenches:
True to my woodworking skills, though I built these to plans to the best of my ability, they are not completely straight in all dimensions. In my defense some of the 2x4s I bought were curved or twisted. But I'm sure there's a little builder error involved as well. They are stable and level though, which is all that I really care about.
The bench dimensions are 60" x 24", which might seem a little long and narrow. However, the tables are designed to be easily movable and to accommodate a variety of shapes. They can be pushed together to make a larger workspace, or laid end-to-end to work on longer structures like wings. For a small plane like the Sonex they should be adequate for just about anything I'll be building.
Next I need to build some stairs into the building (the leveling process left about a 15" step up into the doors), and get things cleaned up from all the woodworking. Once that's done it's on to building! I'm hoping I can at least get that started sometime this weekend.
26 May 2010
My New Workshop is Here
This morning I finally took delivery of my new workshop, so I can begin building Sonex #1416. It's a 12'x24' aluminum utility building, wired for electricity. I had the builder put in a full length (12') workbench and pegboard along the back wall, which he graciously did for just his cost of materials. Here's what the inside looks like:
It looks big, but only because it's empty. Once I have work benches, built parts, and an 18' fuselage in it things will get cramped real fast, I'm sure. I have a 10,000 BTU portable air conditioner that will keep things tolerable (I hope) in the Georgia summer heat, and I can open the windows/doors in the evenings or when things are only moderately warm outside.
Overall I think the new digs are just what the doctor ordered for building a Sonex, given the very limited building space in my home. The building inspector still has to sign off on it, but I'm not expecting any trouble there. Then I can move my stuff in and start getting it set up to make airplane parts. I'm planning to start building in earnest sometime around the second weekend in June.
14 May 2010
Polish vs. Paint
I've been struggling with what finish I want on my Sonex when finished. The two possibilities are to paint the airframe or to polish it. How paint works is obvious; like an automobile, you spray on primer and paint in whatever color or combination of colors you choose. Maintenance is pretty easy, consisting of periodic washing and waxing.
The downside is that paint is heavy. You wouldn't think so, but a Sonex airplane that is painted generally weighs 25 to 30 pounds more than one without paint. That weight translates directly into reduced useful load for the airplane, which means 25-30lb less fuel, baggage or people can be carried. That becomes critical when your 300lb friend wants a ride in your airplane. There are other ways to reduce weight on a Sonex, but none are more dramatic than choosing to polish instead of paint the airplane.
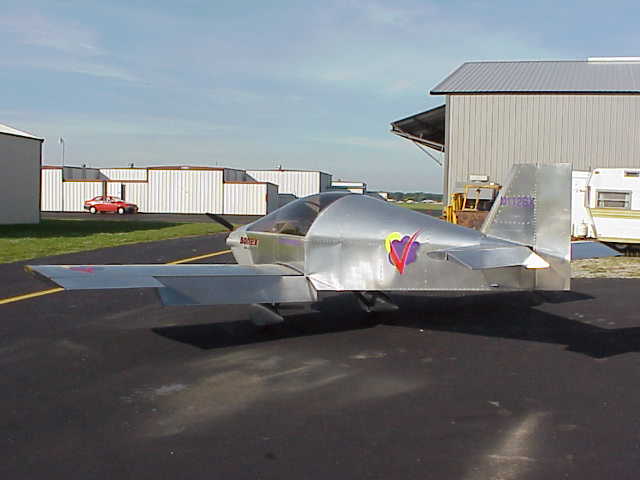
So what does polishing entail? Well, there is a product called Nuvite that is a polish specifically for aircraft aluminum. Various grades from coarse (grade F9) to fine (grade S) are used with an electric buffer to bring the metal from a rough manufactured look to a mirror-like reflective shine. Here is a Sonex with an bare metal finish:
And here's one that has a high grade polish job:
As you can see, there is a huge difference! The polish really makes a plane look "finished" to me...bare unpolished metal just looks raw and uncompleted.
Many people bemoan the amount of work and especially unkeep a polished plane takes to keep that mirror shine. I was worried about that as well...after all, I want to spend my time flying, not inside a hangar buffing! I have talked to several owners of polished planes, and the comments are very uniform. Yes, it's a lot of work up front to get that shine from raw metal parts. However, once polished it usually only takes one good polish annually with the finest grade of Nuvite to keep the plane looking good (assuming you wipe the bugs and grime off after every flight as you should with any plane, painted or polished).
So with that, polishing starts to look pretty good. No doubt you'd now say "you haven't even started building yet, why are you even worried about this now?" I'm glad you asked. If you polish a plane, the easiest way to do it is before you put it together. If you can build the rudder, polish it, and then store it until assembly, you don't have to worry about it later, and it's ready to go. That way you break up a tedious polishing chore that will take many hours into smaller, less boring chunks.
My plan right now (subject to change without notice) is to polish the parts as I go, and paint the fiberglass parts (engine cowling, wing tips, tail tips, and wheel pants) a bright color, maybe yellow or orange. I've also thought about trying to make a polished and yellow/black homage scheme to one of my other favorite polished airplanes, the North American F-86 Sabre from the Korean War:
But that's just daydreaming at this point!
06 May 2010
The Tail Kit is Here
I received the tail kit from Sonex today! It came as three big boxes strapped to a small pallet. Also included on the pallet were the complete Sonex engineering plans I ordered, and my tools from the builder workshop, which Sonex graciously shipped back to me as part of my purchase. I have to inventory the parts and make sure everything is here, then I'll be ready to...wait. I can't really do anything until my workshop is ready, probably sometime in the next couple of weeks.
04 May 2010
Fast Sonex Shipping!
I just received an e-mail that the tail kit I ordered last Sunday (02 May) shipped today (04 May) and will arrive Thursday (06 May). Now that's fast shipping, especially for a freight company. Unfortunately, this probably means I will have to sit and stare longingly at the tail kit for a couple of weeks until my workshop gets set up.
The Sonex Introductory Builder Workshop
Building an airplane is a big project. Huge really, especially if you are like me and have not done any metalworking since shop class in high school. Luckily, the great people at Sonex Aircraft bend over backward to make people new to homebuilding as comfortable as possible with the process. One of the ways they do this is through the Sonex Intro Builder Workshop.
The workshop is a good mix of talks on various Sonex topics (construction, powerplants, props, how it flies, etc), Q&A, and hands-on experience working with sheet aluminum and extruded aluminum angle components. Being essentially a family business, you get a lot of quality time with John Monnett (designer of the Sonex and many other aircraft), Jeremy Monnett (John's son and CEO of Sonex), and all of their friendly employees. Here's me and John Monnett in front of some of his creations:
There is some sales talk in the workshop, but it's never pushy, and more in the context of "here are your options if you build a Sonex, and here's what they cost." Honestly, with the enthusiasm and excitement the Sonex staff have for their aircraft, the planes pretty much sell themselves.
The practical project in the workshop is to take three sheets of 6061-T6 aluminum sheet, a 12" length of of extruded aluminum angle, and a handful of rivets, and make a mock-up wing spar section, a wing rib, and a leading edge skin. The Sonex people talk you through the whole process, and the employees wander around and make sure you're not going to build it totally wrong or take off your fingers with the band saw. In the end it looks something like this:
This is a big confidence builder, since it covers many of the skills you'd need to build a Sonex. In fact, unless you are scratch building from just plans, building might even be easier than a lot of what the workshop covers. In the kit, for example, the wing ribs come preformed and ready to go, so you would not have to fabricate them from aluminum sheet.
In the end, I ordered the Sonex tail kit (includes the entire empennage -- horizontal and vertical stabilizers, elevator, and rudder) and the complete airframe plans. I'm now an official "plans holder" and have some additional builder support and access to additional company resources. Thus my Sonex project also has a number, corresponding to the serial number of my plans: 1416. Now I'm just waiting for the parts to arrive and my workshop to be built and installed (should happen by the end of the month)...then I'll start building!
Subscribe to:
Posts (Atom)
