26 May 2010

My New Workshop is Here

This morning I finally took delivery of my new workshop, so I can begin building Sonex #1416.  It's a 12'x24' aluminum utility building, wired for electricity.  I had the builder put in a full length (12') workbench and pegboard along the back wall, which he graciously did for just his cost of materials.  Here's what the inside looks like:


It looks big, but only because it's empty.  Once I have work benches, built parts, and an 18' fuselage in it things will get cramped real fast, I'm sure.  I have a 10,000 BTU portable air conditioner that will keep things tolerable (I hope) in the Georgia summer heat, and I can open the windows/doors in the evenings or when things are only moderately warm outside.

Overall I think the new digs are just what the doctor ordered for building a Sonex, given the very limited building space in my home.  The building inspector still has to sign off on it, but I'm not expecting any trouble there.  Then I can move my stuff in and start getting it set up to make airplane parts.  I'm planning to start building in earnest sometime around the second weekend in June.  

14 May 2010

Polish vs. Paint

I've been struggling with what finish I want on my Sonex when finished.  The two possibilities are to paint the airframe or to polish it.  How paint works is obvious; like an automobile, you spray on primer and paint in whatever color or combination of colors you choose.  Maintenance is pretty easy, consisting of periodic washing and waxing.

The downside is that paint is heavy.  You wouldn't think so, but a Sonex airplane that is painted generally weighs 25 to 30 pounds more than one without paint.  That weight translates directly into reduced useful load for the airplane, which means 25-30lb less fuel, baggage or people can be carried.  That becomes critical when your 300lb friend wants a ride in your airplane.  There are other ways to reduce weight on a Sonex, but none are more dramatic than choosing to polish instead of paint the airplane.

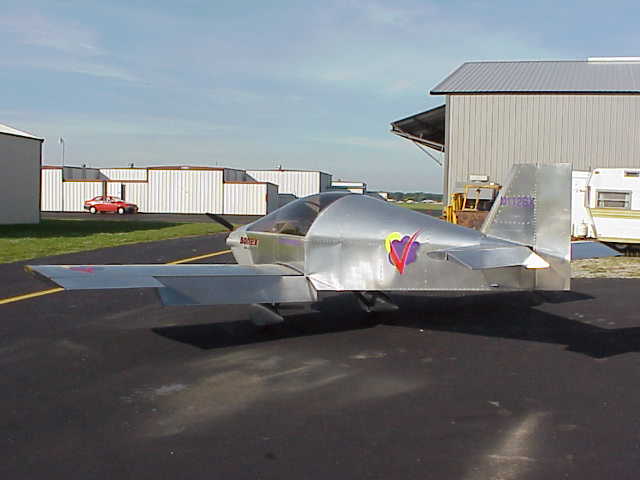
So what does polishing entail?  Well, there is a product called Nuvite that is a polish specifically for aircraft aluminum.  Various grades from coarse (grade F9) to fine (grade S) are used with an electric buffer to bring the metal from a rough manufactured look to a mirror-like reflective shine.  Here is a Sonex with an bare metal finish:


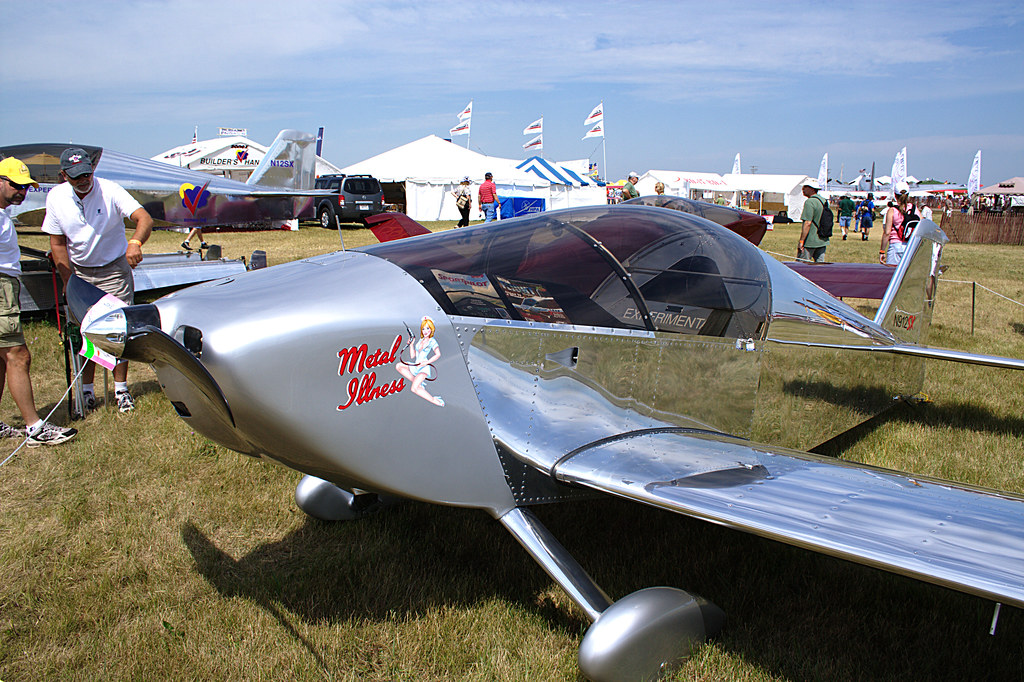
And here's one that has a high grade polish job:


As you can see, there is a huge difference!  The polish really makes a plane look "finished" to me...bare unpolished metal just looks raw and uncompleted.

Many people bemoan the amount of work and especially unkeep a polished plane takes to keep that mirror shine.  I was worried about that as well...after all, I want to spend my time flying, not inside a hangar buffing!  I have talked to several owners of polished planes, and the comments are very uniform.  Yes, it's a lot of work up front to get that shine from raw metal parts.  However, once polished it usually only takes one good polish annually with the finest grade of Nuvite to keep the plane looking good (assuming you wipe the bugs and grime off after every flight as you should with any plane, painted or polished).

So with that, polishing starts to look pretty good.  No doubt you'd now say "you haven't even started building yet, why are you even worried about this now?"  I'm glad you asked.  If you polish a plane, the easiest way to do it is before you put it together.  If you can build the rudder, polish it, and then store it until assembly, you don't have to worry about it later, and it's ready to go.  That way you break up a tedious polishing chore that will take many hours into smaller, less boring chunks.

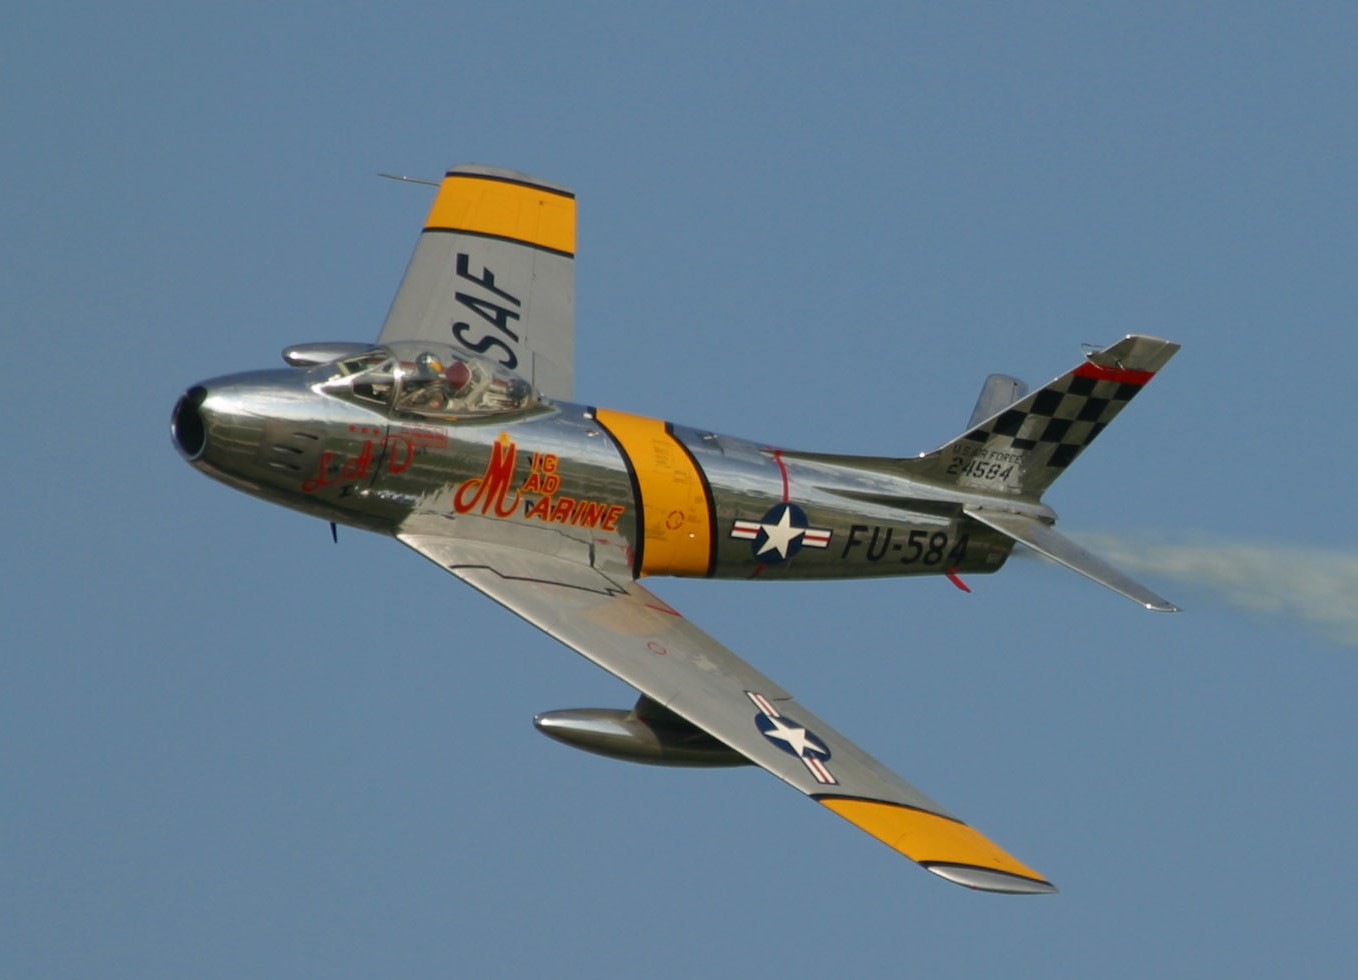
My plan right now (subject to change without notice) is to polish the parts as I go, and paint the fiberglass parts (engine cowling, wing tips, tail tips, and wheel pants) a bright color, maybe yellow or orange.  I've also thought about trying to make a polished and yellow/black homage scheme to one of my other favorite polished airplanes, the North American F-86 Sabre from the Korean War:


But that's just daydreaming at this point!

06 May 2010

The Tail Kit is Here

I received the tail kit from Sonex today!  It came as three big boxes strapped to a small pallet.  Also included on the pallet were the complete Sonex engineering plans I ordered, and my tools from the builder workshop, which Sonex graciously shipped back to me as part of my purchase.  I have to inventory the parts and make sure everything is here, then I'll be ready to...wait.  I can't really do anything until my workshop is ready, probably sometime in the next couple of weeks.


04 May 2010

Fast Sonex Shipping!

I just received an e-mail that the tail kit I ordered last Sunday (02 May) shipped today (04 May) and will arrive Thursday (06 May).  Now that's fast shipping, especially for a freight company.  Unfortunately, this probably means I will have to sit and stare longingly at the tail kit for a couple of weeks until my workshop gets set up.

The Sonex Introductory Builder Workshop

Building an airplane is a big project.  Huge really, especially if you are like me and have not done any metalworking since shop class in high school.  Luckily, the great people at Sonex Aircraft bend over backward to make people new to homebuilding as comfortable as possible with the process.  One of the ways they do this is through the Sonex Intro Builder Workshop.

The workshop is a good mix of talks on various Sonex topics (construction, powerplants, props, how it flies, etc), Q&A, and hands-on experience working with sheet aluminum and extruded aluminum angle components.  Being essentially a family business, you get a lot of quality time with John Monnett (designer of the Sonex and many other aircraft), Jeremy Monnett (John's son and CEO of Sonex), and all of their friendly employees.  Here's me and John Monnett in front of some of his creations:


There is some sales talk in the workshop, but it's never pushy, and more in the context of "here are your options if you build a Sonex, and here's what they cost."  Honestly, with the enthusiasm and excitement the Sonex staff have for their aircraft, the planes pretty much sell themselves.

The practical project in the workshop is to take three sheets of 6061-T6 aluminum sheet, a 12" length of of extruded aluminum angle, and a handful of rivets, and make a mock-up wing spar section, a wing rib, and a leading edge skin.  The Sonex people talk you through the whole process, and the employees wander around and make sure you're not going to build it totally wrong or take off your fingers with the band saw.  In the end it looks something like this:


This is a big confidence builder, since it covers many of the skills you'd need to build a Sonex.  In fact, unless you are scratch building from just plans, building might even be easier than a lot of what the workshop covers.  In the kit, for example, the wing ribs come preformed and ready to go, so you would not have to fabricate them from aluminum sheet.

In the end, I ordered the Sonex tail kit (includes the entire empennage -- horizontal and vertical stabilizers, elevator, and rudder) and the complete airframe plans.  I'm now an official "plans holder" and have some additional builder support and access to additional company resources.  Thus my Sonex project also has a number, corresponding to the serial number of my plans: 1416.  Now I'm just waiting for the parts to arrive and my workshop to be built and installed (should happen by the end of the month)...then I'll start building!